# Command Line Access
The Storefront Cloud CLI tool is designed to let you manage your Storefront Cloud namespaces. Most of the operations are available for the user as a self service. In case of any problems or custom needs, please contact the Helpdesk
Shortly after you register your account on the storefrontcloud.io site, you should receive a contact request from the Cloud Team. Then after agreeing on the service terms and conditions, the Cloud Team will provide you with:
- kube.config file that you can paste or import to this tool for getting access to your Kubernetes cluster,
- login and password to the Storefront Cloud Code Access portal.
Here are the setup steps for getting access to your cloud:
# Install storefrontcloud-cli
First, install storefrontcloud-cli (requirements: node 8.x+, yarn):
git clone https://github.com/StorefrontCloud/storefrontcloud-cli.git`
cd storefrontcloud-cli
yarn install
# Setup your account:
Please do run:
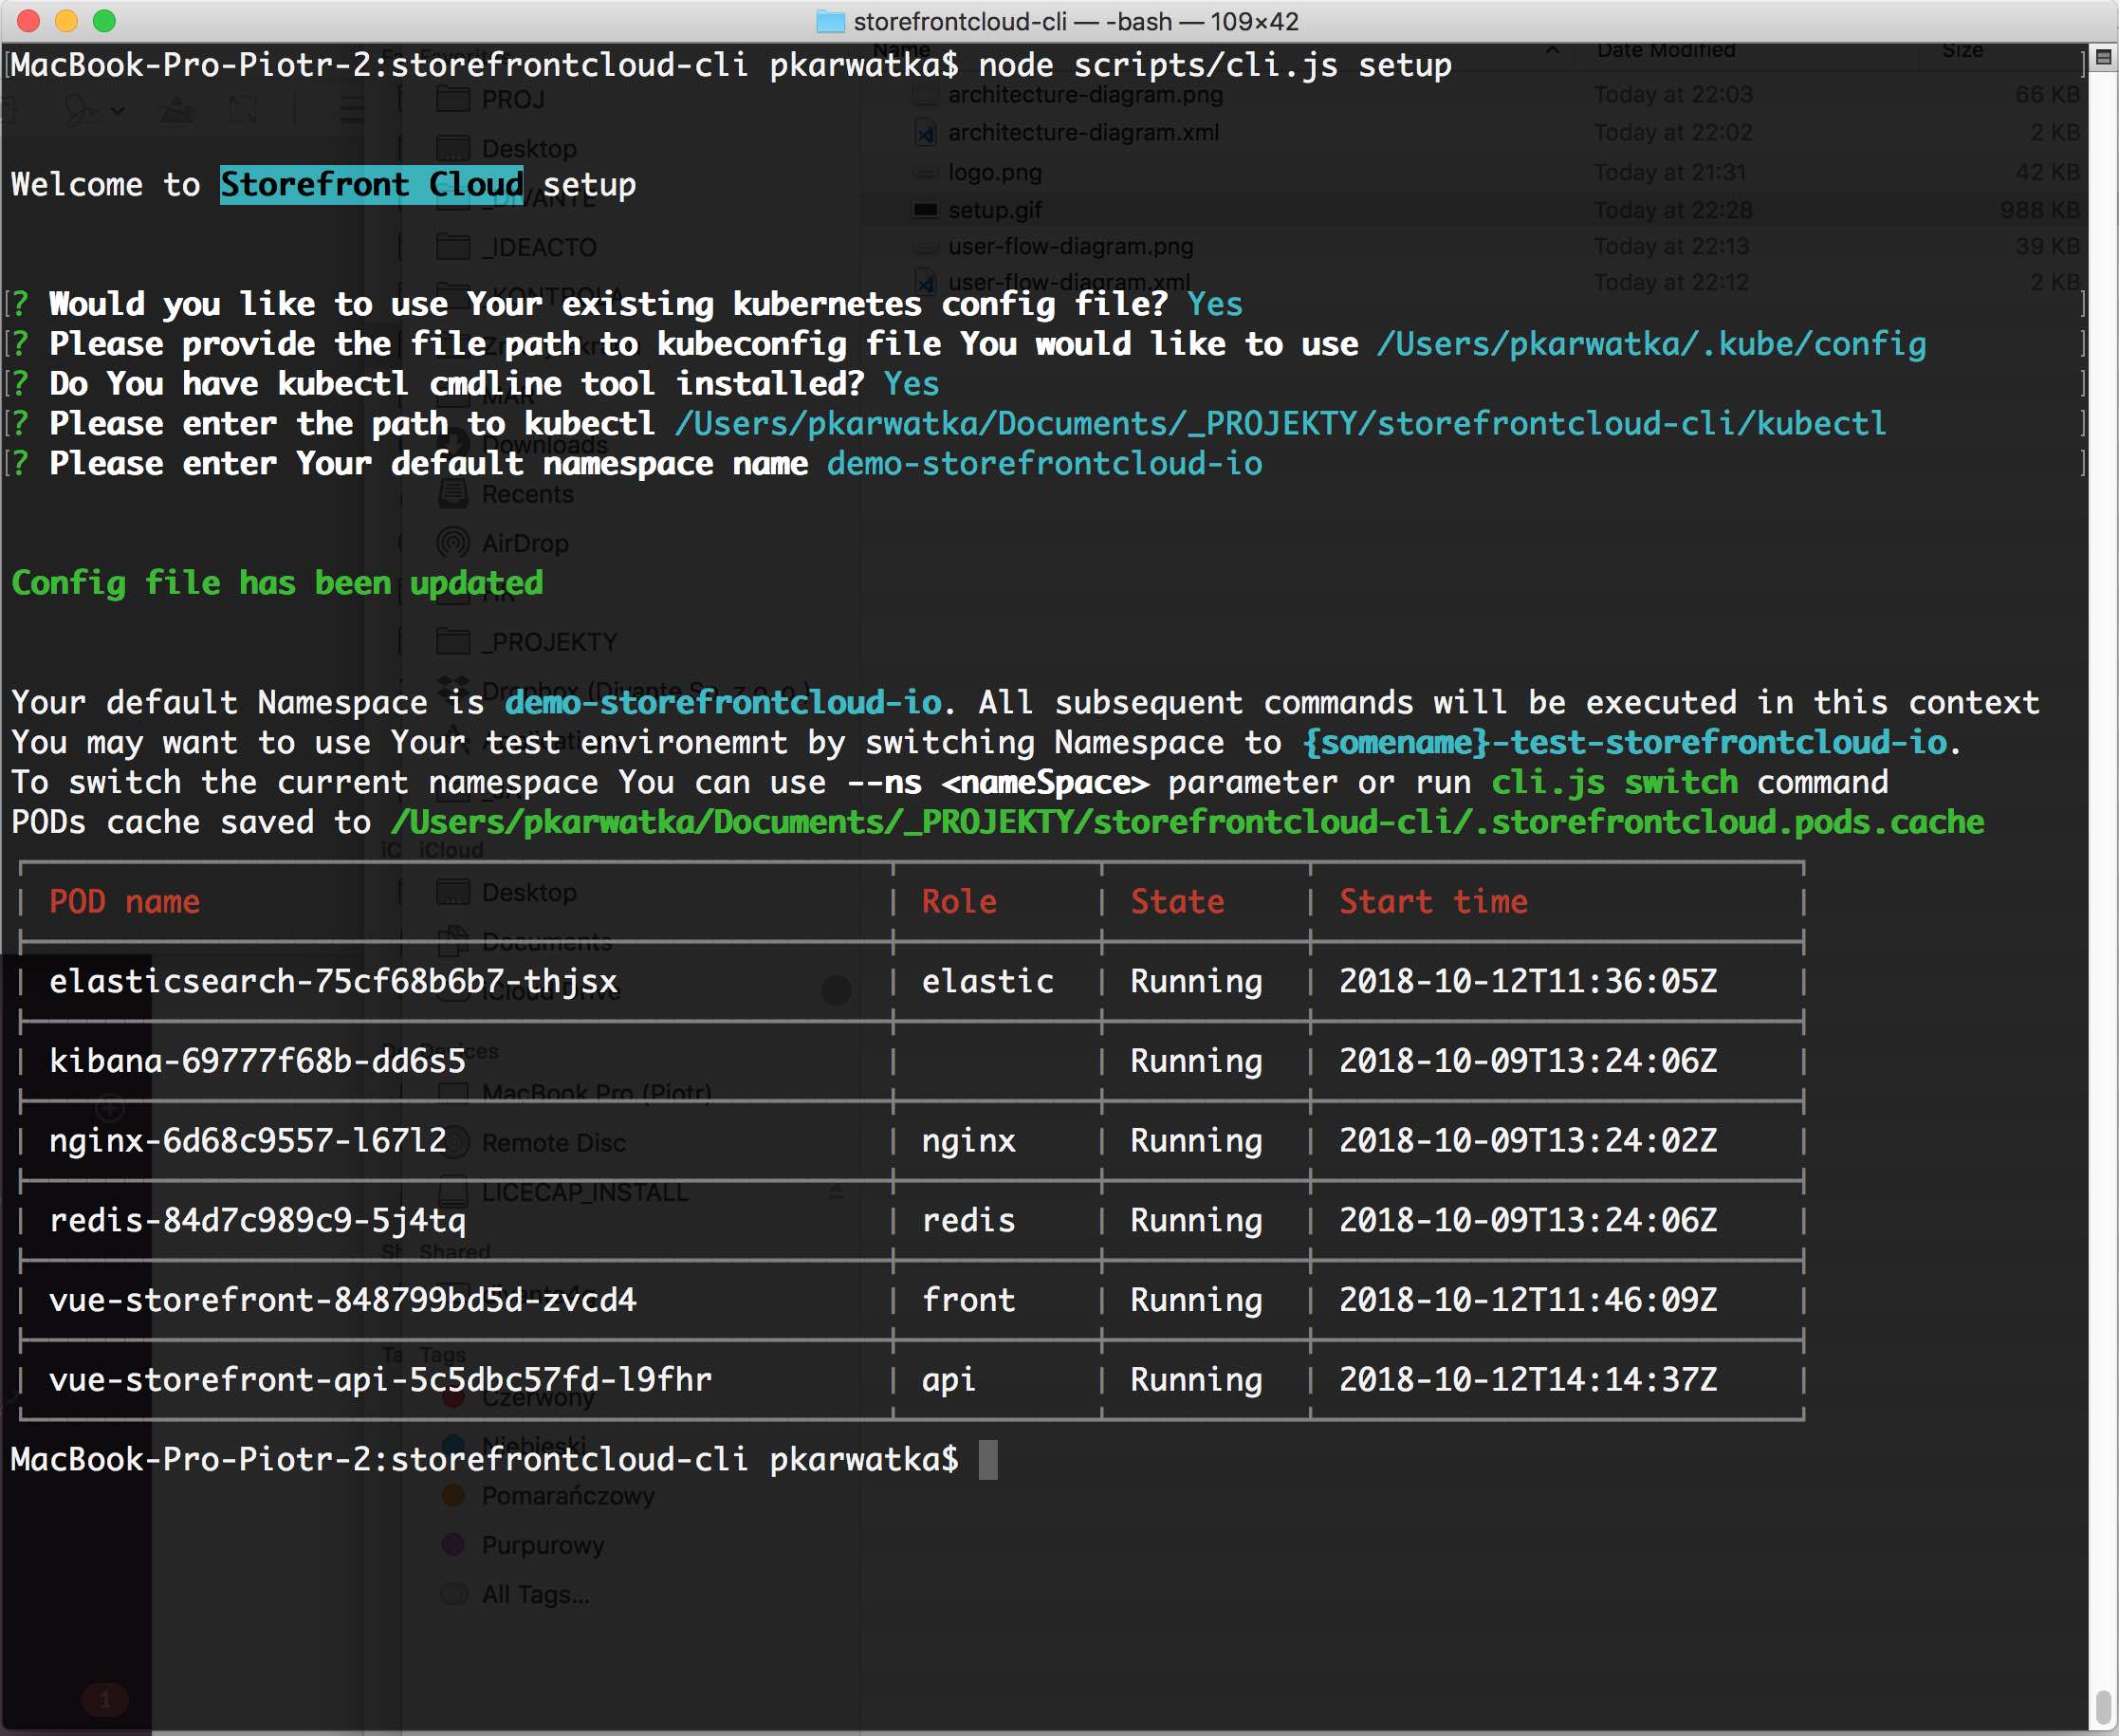
node scripts/cli.js setup
The setup wizard will ask you first about the kube.config file. You can save the file received from the Cloud Team to your local file system (for example: ~/.kube/config which is the default path) OR you can use your default system editor to paste the config content directly during the setup.
Then you have the option to use your existing kubectl tool. If you haven't used it before the setup will download and install the tool to the current working directory.
The last question is about the default namespace. Please check the architecture diagram above. In our case, we provide the demo-storefrontcloud-io default namespace. That means that all subsequent calls will be made to the public instance of demo.storefrontcloud.io PODs. You can switch the default namespace by using the
node scripts/cli.js namespacecommand OR using the--ns commandwhich is supported by all cli commands.